
As an Amazon Associate, BE Family Travel earns from qualifying purchases. Learn More
Have you ever had a vehicle break down or have issues while you’re on a road trip with your kids? Ever had to worry about how and where to get this fixed when you’re out of town? It has happened to us more than once. Each time it has been scary, worrisome, and at the very least extremely inconvenient and frustrating. Not to worry, the following information is designed to help you get your car ready for your next road trip.
Following the instructions below will greatly reduce the chance that something will go wrong with your vehicle while you are on your next family road trip. We have learned from our own mistakes and want to share our knowledge with you. Our hope is this information will help make your next road trip, vacation, or travels go much smoother, so you can be as safe as possible, and make beautiful memories together.
Helpful ways to prepare your car for a road trip
There is a lot of information below. If you don’t need it all we have broken it up into convenient sections and you can use the table of contents to skip to a certain section. If there is anything you think we need to add to our list, please let us know. We can learn from each other and together we can travel better.
📌 Pin it for later 📌

Start under the hood to get your car ready for a road trip
When we look under the hood the one thing that will leave you stranded quicker than anything else is the battery. The battery is like the heart of your car. If it quits you are not going anywhere soon. A good battery is important to get your car ready for a road trip.
Battery check
There are several things you need to check with your battery. It is very important to check your battery periodically, because sometimes waiting until it begins to show signs of weakness can put you at risk of being stranded.

This section will teach you how to check the battery yourself. Also, ways to determine if there are more serious alternator issues looming. Checking your car battery is one of the easiest tasks you can do to your car.
If you do not feel confident, or you do not like to check the battery yourself, you can take your vehicle to an auto parts store or car battery shop and most will run these tests for you for free.
Visual Inspection
First, do a visual inspection of the two terminals to make sure it is free of rust, corrosion, or battery acid build-up. If any of these are present, take it to a mechanic or a car battery shop to be professionally checked.
How to test a car battery without a meter
Time needed: 15 minutes
How to test a car battery without a meter.
Turn on your headlights and see if they are bright and have a steady consistent glow.
Leave the headlights on and crank the engine of your vehicle.
Step back and watch the lights again.
You are looking for the same result – a steady, consistent, and bright glow to the headlights.
- Crank the engine of your vehicle
With the vehicle in park, lightly and slowly press the gas pedal and hold as the engine revs to a higher RPMs.
Have a helper check the lights as the engine is revving.
Once again you want to see consistency in the headlights without a considerable dimming or brightening while it’s being revved or after letting off the pedal.
If you see dimming, or an inconsistency in the brightness of the lights during these tests that is a sign of a weak battery or larger issue. I would take the vehicle to be further checked by a mechanic or replace the battery.
Voltage Test
With a voltage test you can ensure that your battery is holding the right voltage. You will need a simple voltmeter for this. If you don’t own one they can be handy to have and are very reasonably priced like this one.
With the ignition switch still turned off. Connect the leads from your voltmeter, like in the picture. The red lead clipped on the positive (red) terminal. And the black lead clipped on the negative (black) terminal.

After the meter is connected check that the battery reads around 12.6 volts or above. Then leave your meter connected and crank the engine. With the engine running the battery should measure around 13.7 to 14.7 volts.
If your voltages lineup then you are good to go and can rest assured your battery is operating optimally. But, if your car battery is reading substantially lower you will want to have it checked by a mechanic.
Watch this step-by-step video about how to test a car battery with a voltmeter or a Multimeter.
Load Test
A load test is a deeper check to see how your car battery performs under expected peak load conditions. This test is checking your car battery’s cold cranking amps, which can determine if the load battery can deliver for 30 seconds at 0*F without falling below 7.2 volts.
When your battery passes a load test you can rest easy. Knowing that you can simultaneously play the radio, your mini-van’s DVD player, have the AC on max, while charging all your devices, headlights on, and maintain 70 mph with no issues. A good battery is the first step to get your car ready for a road trip.
Check your car’s fluids before going on a road trip
The life blood of your car is the fluids. Your car will run and operate with low or dirty fluids but it can be detrimental to the long term health of your vehicle.
Visual fluid leak check
One of the quickest and easiest ways to visually see if you have a fluid leak is to look for spots under the car. This is important to get your car ready for road trip. You can use a large cardboard box broken down flat. Then slide the cardboard under the front of the car between the front wheels and leave overnight. When you are ready to check, pull the cardboard out and see if there are spots on it.
Another quick test is the sniff test. While the engine is running and hot. Can you smell burning? Do you see smoke? That is a sign that a fluid of some sort is dripping onto your hot engine.
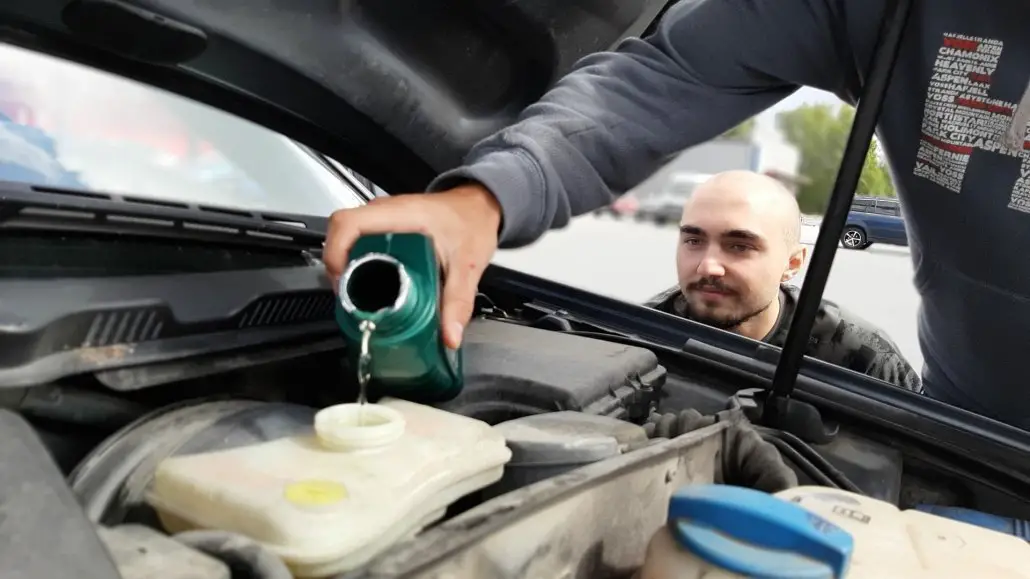
Top 6 fluids to check to get your car ready for a road trip
Here are the different types of fluids you need to check and how to find or distinguish them. Let’s pop that hood and get rocking. First, to check your fluids you will want to park your vehicle on a level area. Turn the engine off and let the vehicle sit for at least 10 mins.
1. Engine Oil
The engine oil is the most important fluid for your vehicle, next to fuel. To check your engine oil there is a dipstick, usually a yellow (sometimes orange) ring or handle. In some cases it may also say engine oil or have a small logo of an old-timey oil can with one drip coming from the spout.
First, pull the dipstick out using the ring or handle. Be careful as it is really long, so have a paper towel in the other hand to catch it near the bottom just before it comes out. Wipe the bottom of the dipstick with your paper towel, where the level markers are. Then reinsert the dipstick all the way back in until it locks or won’t go in any further. Pull it once again. However, this time watch the markers at the end to see where the oil level is located. There is a minimum and a maximum marker. The optimal oil level should fall within hash or X marks, between the two markers.
How to add oil
If your oil is below the minimum marker then you need to add some fresh oil to bring it up. But, you do not want to fill above the maximum marker. Low oil could be a sign of leaking or burning oil. Both of these should be checked by a mechanic.
While you have the dipstick out check the look and feel or condition of the oil. Take a little oil and rub it between two fingers. It should feel slick and smooth, not gritty. Feeling gritty or feeling particles in the oil is a bad sign that something is wearing out.

Take a look at the oil and if it is an amber or yellow color then life is good and your oil is even better. When visually checking oil use the coffee rule. Anytime I can associate with coffee I do! Black oil that “looks like black coffee” means it needs an oil and filter change. Even just a darker coffee color is due for a change.
A milky color that “looks like milky coffee” means coolant is leaking into the engine.
That leads us to our next fluid.
2. Engine Coolant
Antifreeze or Coolant helps to keep your engine from overheating. Coolant only needs to be checked every 50,000 mile or so. I would still make sure it is full because you may have a leak that needs to be addressed.
To check the coolant levels open the cap on the radiator. DO NOT open the radiator cap while the engine is hot! I would absolutely let the engine cool for hours or overnight before checking. A hot radiator will spray scalding fluid out as pressure is released.
The radiator cap is usually located directly at the front in the center of the engine. It is circular in shape with two small extensions on opposite sides to allow for grip when opening. There should be a warning label not to open when hot.
With a cold engine, open the cap and visually spot the fluid close to the top. You won’t be able to see deep down inside the radiator. So, if you can see fluid it’s probably good. There is sometimes an expansion tank for coolant. A small tube will lead from near the radiator cap to the tank.
If your vehicle has an expansion tank just make sure the fluid level is between the minimum and maximum lines.
3. Brake Fluid
You need to stop, collaborate, and listen. Your brake fluid needs to be in the best possible condition. OK, I’ll stop with the Vanilla Ice references now 😂 but I need you to stop when you press the brakes so let’s check your brake fluid. The brake fluid reservoir is typically a very small plastic reservoir with a black or yellow lid. See picture.
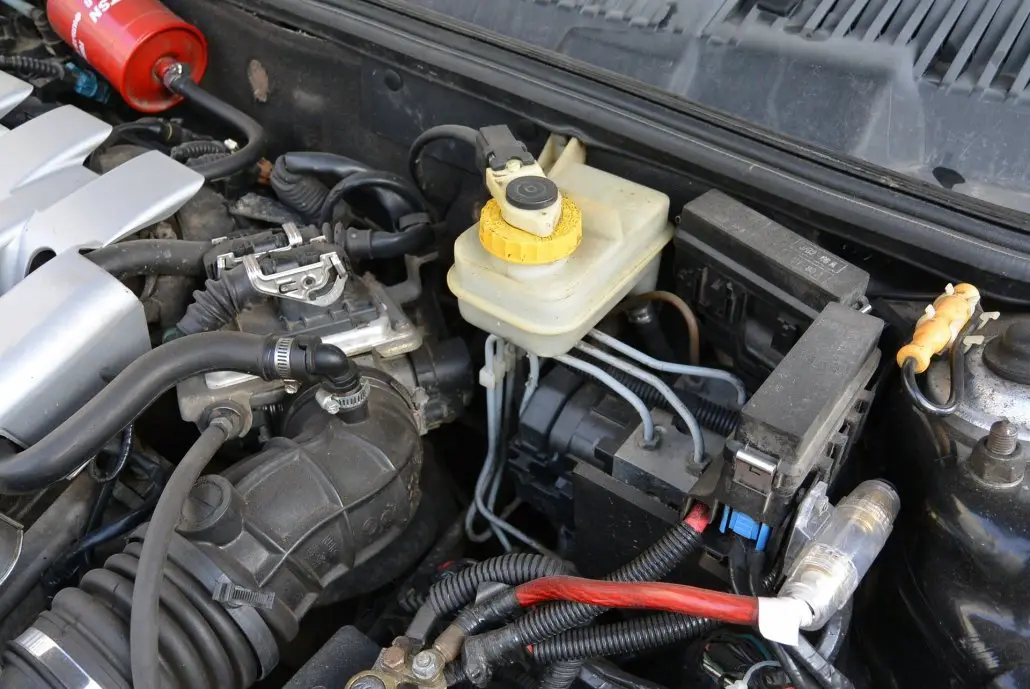
As with the other fluids, make sure the level falls somewhere between the minimum and maximum markers. You will find the markings on the reservoir and not on a dipstick. If low, you need to add some brake fluid, however, be aware that you get the correct type for your vehicle. Brake fluid comes in different colors. Good brake fluid should be translucent. If it’s not translucent you should have it replaced.
4. Power Steering Fluid
This one cuts deep as I just had to replace our power steering pump. Ouch! And yes, it’s the opposite of cheap. There is no set time frame to change your power steering fluid. You will just want to keep it topped up and happy.
In keeping with the common theme, there will be a small plastic reservoir with typically a black or red capped lid. Be careful not to confuse the brake fluid reservoir for the power steering fluid reservoir. Power steering fluid should have a dipstick where brake fluid typically does not.
Check the dipstick and make sure your level is between the minimum and maximum levels. And add some power steering fluid if it’s low, but keep it below the maximum.
5. Windshield Wiper Fluid
This fluid is a bit easier and a little less critical to the operation. However, after a long day of driving with the dust, bugs, and road grime you will be thankful for it. The windshield wiper reservoir is usually well marked with an obvious “windshield with spray” logo on the cap. You can choose any type of fluid. I like to go with the non-freeze type in the fall through winter months.
6. Transmission Fluid
The last of the fluids, but definitely not the least. Transmission fluid is just as important as your oil, it does pretty much the same job for your transmission as your oil does for your engine. It lubricates and cools all the gears, valves, and inner workings of the transmission.
Transmission Fluid is also a lifetime lubricant but it should be checked periodically for leaks or any other signs of possible looming issues. In order to check the transmission fluid it’s a slightly different process.
First, you locate the dipstick. If you have one it is commonly mistaken for the oil dipstick, so if you find the oil it will be the other one. This time you will need to start the engine of the vehicle, and put it in park or neutral, while you check the dipstick exactly the same way as the oil.
The fluid needs to be between the minimum and maximum lines. It should be amber or red in color and have a similar smooth feel as the oil, not gritty. If you do need to add transmission fluid, add it slowly with the engine running, then shift through the gears to allow the fluid to settle into the transmission properly.
Check your drive belts to get your car ready for a road trip
Drive belts on your vehicle are more tricky to check. Depending on your vehicle there could be one or more. Some have timing belts, alternator belts, air conditioning belts, and sometimes these belts are all controlled by a serpentine belt.
I know your eyes are most likely crossed at this point with steam blowing from your ears. The main thing to look for, or should I say listen for, is squealing. That is the most obvious sign you need some attention to one of your belts.
With the engine running and the hood raised listen to the engine for a few minutes. Also try turning on the air conditioning and you will notice a pull on the engine when the air conditioning kicks in. If you hear nothing squeaking, squealing, or squalling that is a good sign.
Here is another check on the drive belts you can make fair easily. With the engine turned off and cooled, visually locate any belts you can see. If you can reach the belt then twist it with your fingers so you can see the underside. This is where you will typically find cracking or signs or wear. Also, just by feel make sure there is tension on the belt. Excessive play in the belt, signs of wear, or cracks are a sign to get your belts inspected more closely by a mechanic.
Exterior check to get your car ready for a road trip
Next you need to check the exterior of the car, this is anything not under the hood or inside the trunk.
Windshield
Check your windshield closely for small chips or hairline cracks. In many cases your insurance company will repair these for free before they become a larger crack. Traveling or even weather changes can cause a chip or small crack to worsen suddenly. It is a lot easier to deal with these repairs at home, rather than on the road.
Windshield Wipers
Windshield wipers are often overlooked before a road trip. A bad set of wiper blades can make driving treacherous, even dangerous in bad weather. There are two parts to every wiper – the wiper arm (the long metal piece that moves back and forth) and the wiper blade. This actually works like a squeegee and ideally clears the water off to the sides of the windshield.
You can test the windshield wipers, and check the blades and arms, right in your driveway. Start by wetting the windshield with your wiper fluid by activating the button or lever inside your vehicle by the steering column. This will also make your windshield wipers turn on a few times to wipe away the fluid.
Look to see if all the fluid was properly cleared from the drivers line of sight. Typically this is in a semi-circular shape on the front windshield. Also, make sure to check the rear wiper if you have one.

If there are streaks, or areas where the fluid is not being cleared properly, then change your wiper blades. In addition, if there are any pieces of the blade that appear to be loose or dragging behind the rest of the blade, then that would need to be replaced.
If one blade is bad then change both because the other blade is probably not far from needing to be replaced as well. Windshield wipers are actually very easy to change and a small investment for your family’s safety and security.
Check those mirrors
Oh say can you see? Well, let’s make sure before you head out with your family on that road trip. You want to make sure your side mirrors (wing mirrors) are clean and adjusted correctly. You may need to add a small blindspot mirror for extra safety. Some cars come standard with them these days. If not, it can leave you very vulnerable in your blind spot.
Make sure your mirrors are well adjusted for the driver. To cut down on your blind spot adjust the mirror to only show a small amount of the side of your vehicle.
Vehicle lights you should check to get your car ready for a road trip
Checking your vehicle’s lights may seem a no-brainer. Oddly enough we rarely notice when a bulb is out or a fuse is blown until someone tells us.
In this section I will help you decide if your headlights need cleaning to work at their optimal levels for safety. You will need a second person, a child, spouse, or friend to help with this part. Below are 6 different types of lights you should check to get your car ready for a road trip.

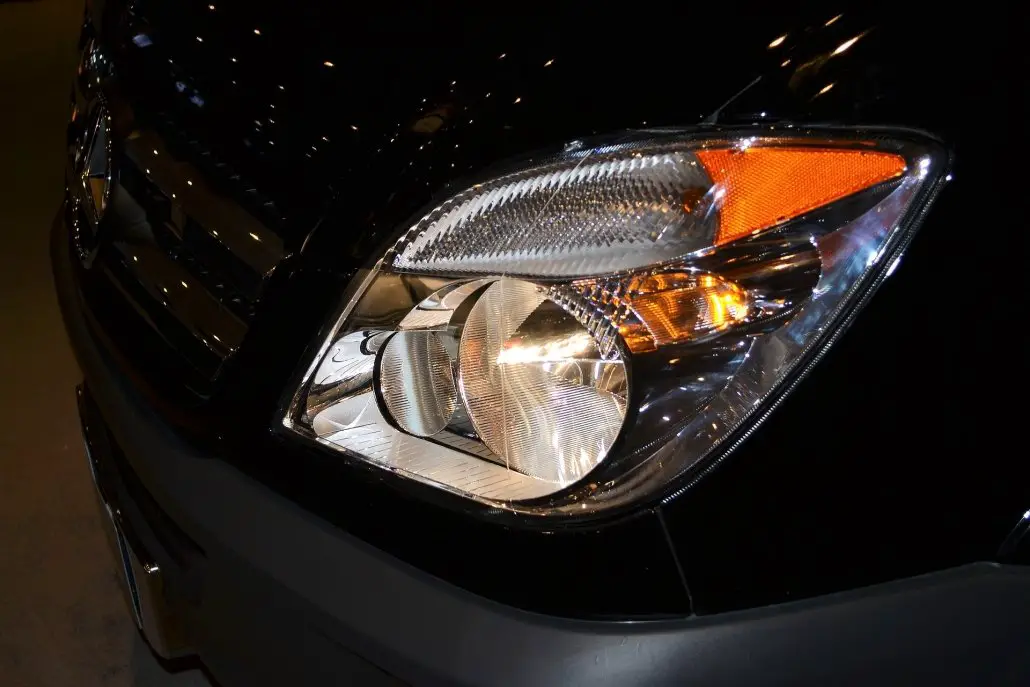
Headlights
After turning on your headlights it is optimal to see two large glowing orbs. The best way to check headlights is to pull the vehicle up to a wall or garage door and stop about 5 feet away. Make sure you are parked in a level spot and you should see the lights shining on the wall. Look to make sure they are equally bright and white, not dim and yellowed. If one is less bright or more yellow than the other, then I would suggest changing them both at the same time.
Dirt can hurt your headlights performance. Or your headlights may be oxidized, and appear yellowed and foggy. Never fear, it can be a very easy fix in 15 minutes to half an hour. Use a reasonably priced headlight cleaning kit or you can DIY a kit by purchasing a few necessary items.
Here is a list of items needed for DIY headlight cleaning, with handy links to buy each:
Here is a video to take you step-by-step through the proper cleaning of oxidized headlights so they will look new again.
High Beams
While you’re up front let’s check the high beams. Your high beams are a separate bulb from your headlights. You should definitely see a huge increase in brightness level when you flip on the high beams.
Tail Lights
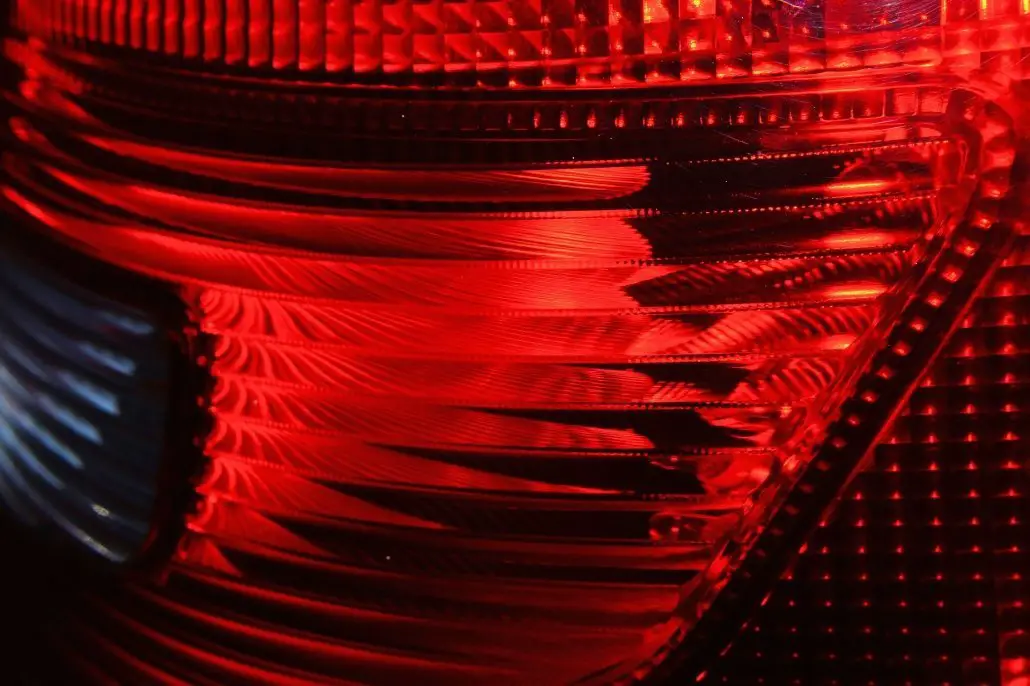
Keep your headlights turned on and walk to the back of the car and make sure both of your tail lights are illuminated. Repeat the same process as with the headlights. Check for oxidation and that they are both equally illuminated to the same brightness level.
Note: For Headlights, High Beams, and Tail Lights if both sides are out, rather than only one bulb, then you most likely have a fuse that has blown.
Turn Signals
Now, I realize you are not all using them. However, I would prefer you do and they are working properly. Just joking. But not really 🤣🤣🤣 Your Turn Signals or Indicator Lights are located on the front, back and in some cases on the mirrors. Turn on one at a time and check from the front and back to make sure they are working correctly.
Hazard Lights
After checking your turn signals make sure to turn on your hazard lights and check those. They use the same bulb as turn signals. However, there is a chance a fuse could be out as the hazard lights operate off a different electrical wiring than the turn signals.
Daytime Running Lights
First start by checking your daytime running lights (DRL) (if you have them). DRL or lamps are designed for you to be seen, rather than to aid you in seeing.
Without turning on your headlights stand at the front of the vehicle and look at both lights. Some DRL will not turn on until you put the vehicle in drive. Be sure to keep your foot on the brake during this test. Your DRL should emit a white, yellow, or amber light. Also, it is completely normal for your DRL to dim slightly after turning on your headlights.
Check your tires and wheels to get your car ready for a road trip
This is where the rubber meets the road… literally! You’ve got to check your shoes before you go for a run. And you have to check your tires before you head out for a road trip. Driving on bad tires could honestly put your family at risk.
Check your tire tread before a road trip
First let’s talk tread. You will want to check the tread on all four tires. To do this you will need nothing more than a quarter. Of course you can pick up a cheap Tire Tread Depth Gauge for measuring to be the most accurate. To do the quarter test. You will hold the quarter with George Washington’s head down, and stick it in the tire tread groove. Ideally part of his head will be covered. If George Washington’s entire head is showing, then you should consider a new set of tires. A good tire can last 3½ years.

The old rule of thumb was the penny test which was the same test but with a penny. It has been determined through testing in more recent years that more tread substantially aids in stopping faster.
In those tests 1/8 inch of tread (quarter test) took about 300 feet to stop in the rain. Less tread, down to 1/16 inch, was unable to stop in 300 feet in the rain.
More tread allows for more water to be expelled from between the tire and the road. This increases your traction on the pavement to avoid hydroplaning and increasing stopping distance.
Properly inflate your tires with air to get your car ready for a road trip
Check your tire pressure before you set off with a tire pressure gauge. The tire pressure can vary while the car is loaded or unloaded. Set the pressure before you load, but if you are hauling a very heavy load for a long trip you may need to reconsider. You can firm up the tires a bit more tight for the trip and then let off a bit of pressure when it is unloaded.
That is a lot to track and keep up with so it is easier to set it and forget it. I also like to recheck pressure before leaving our destination to head home. It is handy to keep a pressure gauge like this one in your glove box.
Check on your tires and they will have a psi listed on the outside of the tires. That is the manufacturer’s recommended pressure to run in those tires. Also wiggle your valve stem a little and listen for the sound of air. If you hear or suspect a leak then take the car to a tire shop to be checked more thoroughly.
Check the wheels on your car before a road trip
Nothing is worse than getting to 65 miles per hour with the whole family aboard only to find your car has a shake. If so, your wheels are probably out of balance. It’s an easy and cheap fix but not something you want the hassle of dealing with while on vacation. Trust me!
This happened to us on the way to the beach. With a 7 hour drive ahead we started calling places along the way to see how quickly we could get our wheels balanced. We finally found a place over 4 hours into our trip. We decided to stop to get the work done and stay the night. That way we could set off early the following morning for the remainder of our road trip and wobble no more.
Brake pads
Brakes are harder to check without taking the wheel off. I would say most brake pads these days will give you a shake or sound as an indicator that it is time to change them. If you feel that don’t leave on your road trip without having them checked or changed.
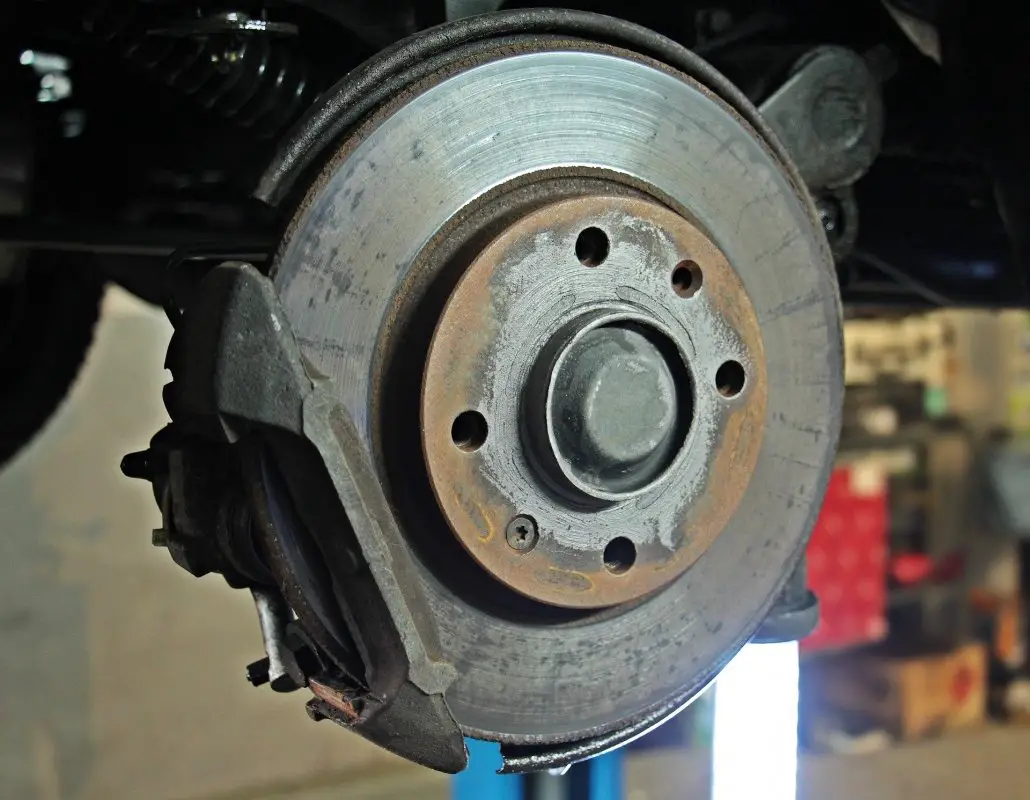
You may have rotors instead of pads on the rear, and sometimes the front. If the rotors become warped it will shake fiercely when you are trying to stop. This does not mean your pads are bad. Sometimes the rotors will warp from being hot and hitting cold water with your tires.
The shake from a warped rotor will feel like your stopping power is greatly diminished but it is not.
It is purely an inconvenience to have warped rotors and it is very expensive to have them changed. It’s best to change your brake pads if possible while having your rotors changed.
Check your spare tire while you get your car ready for a road trip
It is a great idea to always check on your spare tire. If you’ve not used it, just be aware of where it is located. Make sure you have all the tools to change the tire. These are usually located with the tire if it is in the back of the car.
Some are located underneath the vehicle. So just check your owner’s manual if you don’t know where your spare tire is. It is a great idea to know if you have a full sized spare or just a mini or donut tire.
There are so many things to do to get your car ready for a road trip
I hope you found this information to be helpful. I know there is a lot here but we’ve tried to lay it out in a way that is easy to scan, while also including many helpful tips and tricks. We want this information to be helpful to you as you get your car ready for road trip with your family.
If there is a subject or helpful advice you have to make this guide better, then please reach out or leave it in the comments. We want this to be as helpful as possible to our community and to be a resource that will keep more families safe on the road.
Before you head out on your next family road trip make sure to check out our posts: Simplify a Road Trip with Kids or How to Avoid Motion Sickness in Kids. And don’t miss out on the BE Family Kids Travel Tray for Car Seat to help end the “are we nearly there yet” boredom.
As always, let’s BE Family so you can enjoy the journey.
Until next time,
Doug
BE Family Travel
📌 Pin it for later 📌

4 thoughts on “How to get Your Car Ready For Your Next Road Trip”
Comments are closed.